![]()
![]()
![]()
![]()
![]()
![]()
![]()
![]()
![]()
![]()
![]()
![]()
![]()
![]()
|
|
|
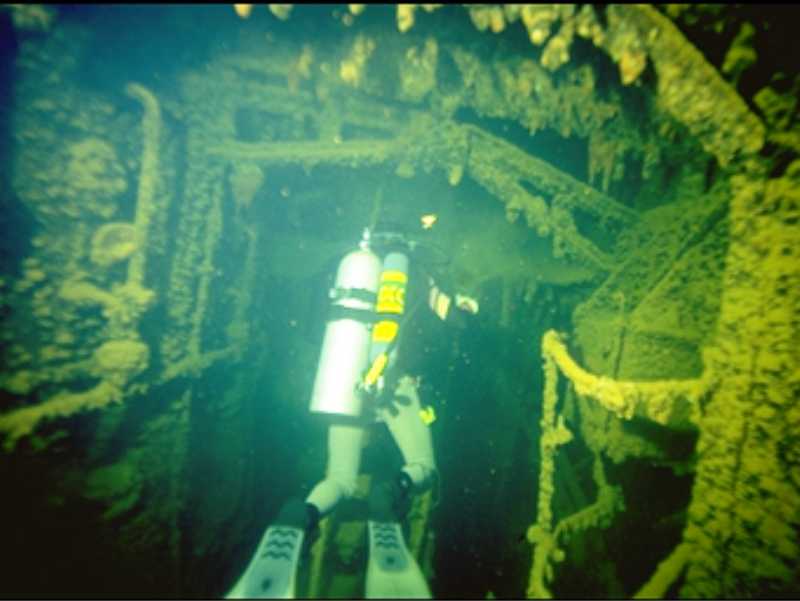
Rod enters a charred corridor in the Shinkoku Maru.We headed way out to the west of Moen Island to the big fleet oil tanker, Shinkoku Maru, which is 152 metres long and sits upright in 40 metres of water. Chenney volunteered to show us how to enter the ship through the torpedo hole on the aft port side. I decided to wear my night-diving helmet with its twin torches each powered by 3 ‘AA’ batteries. We descended over the superstructure and followed Chenney in his white shirt towards the stern. Over the port side, we entered a jagged hole at 35.6 metres in single file. A few twists and turns took us into the large engine room, with a huge diesel engine, catwalks and ladders. After bumping my helmet (instead of my head) on odd bits of steel, and having everything illuminated wherever I looked, I decided to that it would be a good idea to wear the helmet on every dive! We swam around the engine room like birds in a cage and exited through a hole in the roof. I
swam forward past the funnel, along the main deck with its huge
pipes, seeing various artifacts such as the soles of Japanese shoes.
I entered the bridge superstructure with Rod and circled
around, ascending through holes in the floors.
I found two telegraphs and a compass on the navigation
bridge.
There are many electrical cables which I took great care to
avoid.
On top, there was a toolbox and a very heavy shell.
My pony was getting low and I could not see the anchor line.
Paul was heading upwards, so I changed back to my main tank
and followed him to the anchor line.
We did a 4-minute safety stop at 5 metres and surfaced after
39 minutes. |
|
|